CloudBerry Explorer and SyncBack for Amazon S3
A walk through of how to setup SyncBack, PowerShell and CloudBerry Explorer together to send backups to an Amazon S3 bucket.

I've been using SyncBack to handle my backup needs to external drives and FTP for a couple of years and it has worked a charm. Time changes though and I've recently embraced the concept of using online storage for my backup needs, and went with Amazon S3.
Unfortunately at this time, SyncBack does not support using a service like Amazon S3 for backup. Not to worry though, after some research I found a solution for SyncBack by using Windows' built-in PowerShell together with the awesome CloudBerry Explorer which comes with a PowerShell Snap-In.
I'm very happy I found CloudBerry Explorer, as it seems to support all new features introduced by Amazon S3 as soon as they are available, and I'll probably start using it for all my S3 managing needs and not only to sync my backups.
Anyway, let's get started with how to set this up.
PowerShell Setup
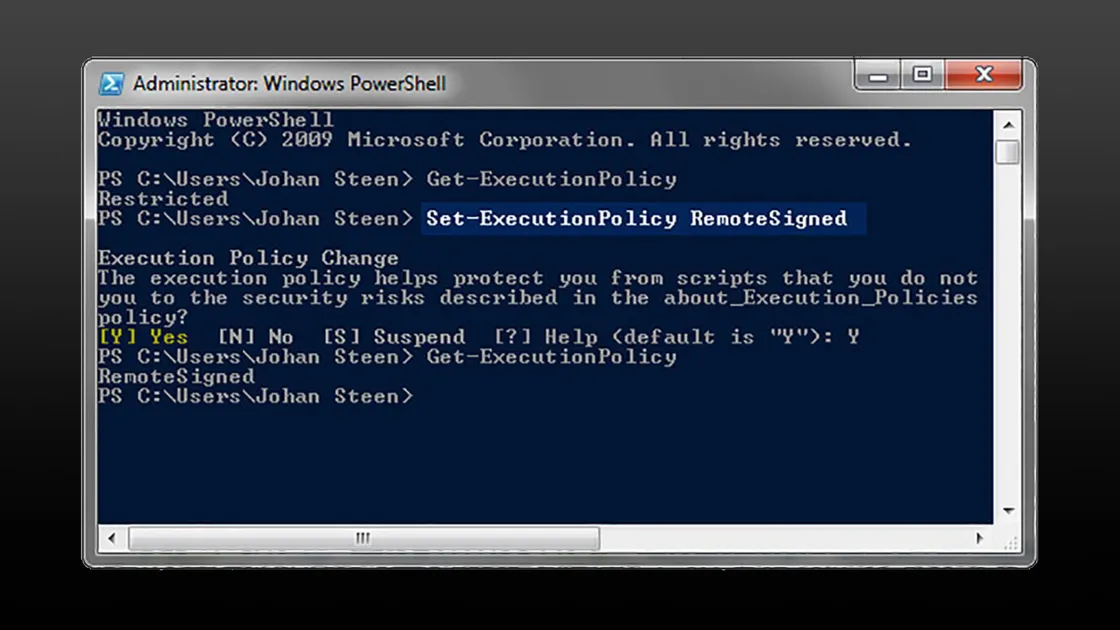
This was more or less the first time I used the new PowerShell in Windows, and I quickly noticed that it didn't execute my script files. By default PowerShell's script execution policy is set to restricted, so I started by changing this policy to RemoteSigned, which means that scripts needs to be signed to be executed except those I write myself. Perfect, just what I wanted.
Change the execution policy in PowerShell with this command:
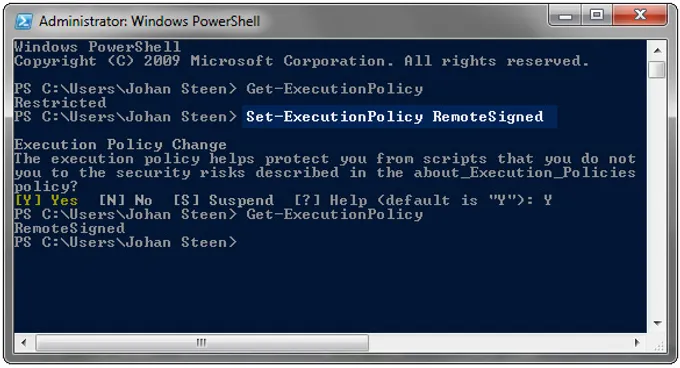
Set-ExecutionPolicy RemoteSignedSee the screenshot below for how to check the current policy and changing it.

CloudBerry Explorer PowerShell Script
All available commands and parameters as well as a few examples for the CloudBerry Explorer PowerShell Snap-In can be found here ».
Copy the script below to a local file and name it something like SyncFolderWithAmazonS3.ps1
# Setup
$key = "<your access key>"
$secret = "<your secret key>"
$s3bucket = "<bucket>/<path>"
$localsource = "<local path to sync>"

# Add the CloudBerry SnapIn to the Console
Add-PSSnapin CloudBerryLab.Explorer.PSSnapIn

# Connect to the Amazon S3 Account and select the path
$s3 = Get-CloudS3Connection -Key $key -Secret $secret
$target = $s3 | Select-CloudFolder -Path $s3bucket

#Connect to local file system and select local folder
$local = Get-CloudFileSystemConnection
$source = $local | Select-CloudFolder $localsource

# Perform the Syncing
$source | Copy-CloudSyncFolders $target -DeleteOnTarget -IncludeSubFolders
It's pretty straightforward, change the values in the first section to your Amazon keys, your backup bucket name and path as well as your local folder to sync to Amazon S3.
Then run it from the command prompt in PowerShell to make sure it works as expected and that the CloudBerry Explorer PowerShell Snap-In is properly installed.
SyncBack Setup
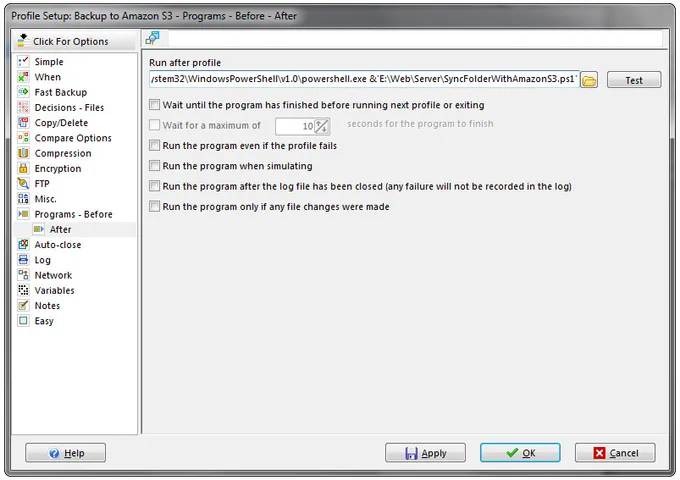
In SyncBack I've created a profile which I've called 'Backup to Amazon S3'. You can make an infinite number of different variations on the actual backup settings of this profile depending on how you like and prefer to make backups. But the core thing to setup is to go into your profile for Amazon S3 backups and switch to expert mode. In the option for 'Programs - Before', go to the sub page for 'After' and set PowerShell with the CloudBerry Explorer script to be run after the profile has finished.

The command-line to add to the 'Run after profile' field:
PowerShell.exe &'E:\Web\Server\SyncFolderWithAmazonS3.ps1'Personally I've set my Amazon S3 Backup Profile to run once every night. All my important working files are backed up to a folder on my local backup drive, using a mirror backup mode to not leave deleted files in the sync folder. This folder is also the folder I've set as the $localsource in my SyncFolderWithAmazonS3.ps1 CloudBerry Explorer PowerShell script. So after the files in the local backup folder has been updated and are in sync with my system, the profile executes the script to sync all the changes to my Amazon S3 bucket as well.
This works great and I just love how secure I feel with my backups these days if something should happen locally.
Cheers!
