Hypastorm Asset Workflow
With Hypastorm completed and released on all target platforms, the time has come to look at a breakdown of my asset workflow during the production of the game.

I've already covered different coding workflows in multiple previous posts as well as my game development file structure, so let's dig into my pipeline to create all the art related assets and my overall workflow to complete a game production.
All in all, the bulk of making Hypastorm took about one month for our tiny two person team, so I had to come up with some efficient workflows and time saving approaches.
Art
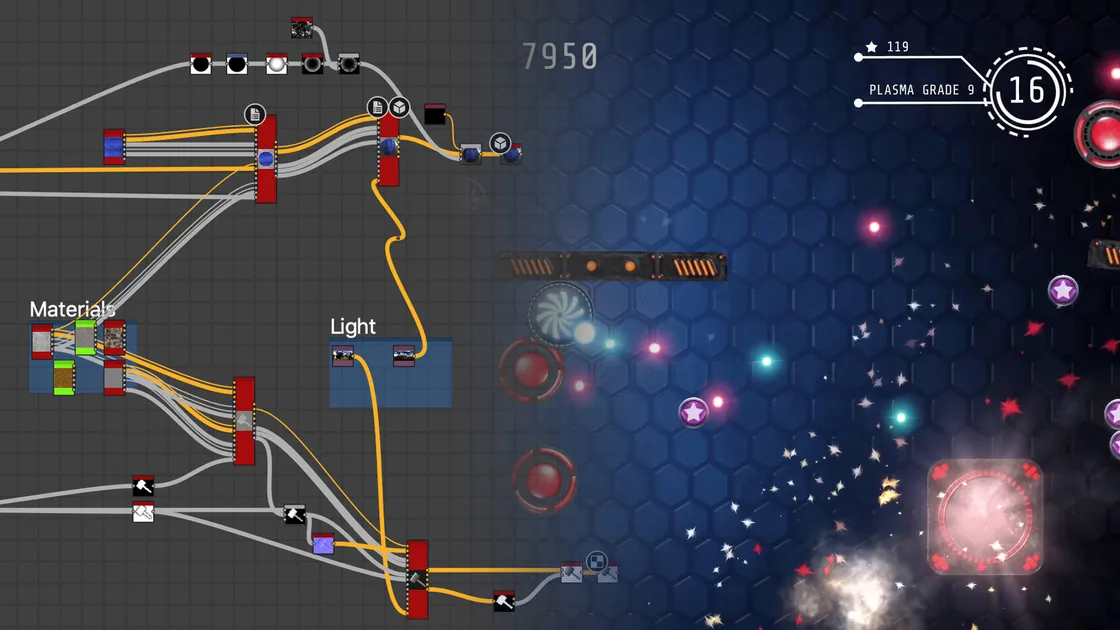
Blender and Photoshop was my main tools to get the graphics done for this game. The actual choice of applications is not very important, in the end it all basically end up as PNG files to be used as sprites in SpriteKit. I wanted to use graphics generated in code for some parts, but it turned out to grow the scope too much, so I canceled that for Hypastorm and added that on my list for things to make for a future game instead. It is all just bitmap graphics in the asset catalog.
Game Objects
Almost every object in the game is initially created as a 3D model in Blender and then rendered out as a Sprite, or a Sprite Atlas if it needed animation.
The other half of my team, Phimrost Sitthikun, did the initial modeling and setup of each game object that required Blender and then I continued working on it to prepare it so it was "game-ready" before rendering.
From the start I designed a full pipeline around Blender where we could store things in a "library" and use a lot of referencing between scenes and files. I wanted to be able to reuse lighting and other things, so I for instance could adjust the lighting in one place and then batch re-render every object in the game in one go with the adjusted lighting.
That is a workflow that I'm used to and comfortable with in other 3D applications I have used in the past. I eventually got this to work in Blender, as it theoretically has every feature required to achieve this.
Unfortunately, Blender was not very stable.
One of my goals with the project was to get more into the world of Blender, so I really wanted Blender to work out and gave it more chances than I normally would give an application with issues. But it is simply not there yet. It is not production ready and extremely unreliable in certain scenarios.
While the above mentioned setup worked in theory, in reality it turned Blender into a crash fest. Parts of scenes got corrupted. Reopening a Blender file relying heavily of linking between files was a lottery if it would work again or not, changing a view could be enough for a repeatable crash. More times than I can count the file eventually became corrupted and I had to manually repair it by extracting assets one by one from the .blend file or revert to an older version and redo a lot of work.
That quickly got boring and tedious after a few times.
Never in my career have I encountered a DCC tool that unreliable in some key areas. While Blender impresses me in some scenarios, I can't rely on it in others.
In the end I patched the assets enough via salvaged files to get the artwork I needed out of Blender. I've adjusted my 3D pipeline for the next game, and I have invested in Houdini as the core of the 3D workflow. Houdini has been a joy to work with so far. I felt right back at home after a few days with Houdini after weeks of rage quits with Blender.
Houdini is stable. I've never appreciated stability in an application as much as I did after a few weeks with Blender.
Anyway, when it comes to modeling, I find Blender very stable and have never run into any issues there. Perfectly fine workflow wise and stable wise. Blender is the modeling tool in the pipeline for now. And maybe a render tool.
The short version, I wasted too much precious time recovering and repairing Blender files, when I used features that obviously are not yet stable enough to rely on in a production. Lesson learned and my pipeline is adjusted accordingly.
UI
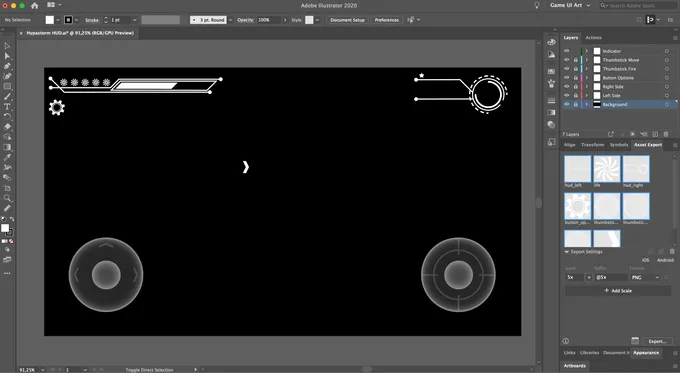
I created every main UI element in Adobe Illustrator. The Asset Export panel in Illustrator was a huge help for an efficient workflow to streamline getting the art out of Illustrator and into the game.
By piping the output from the Asset Export via my Xcode Asset Catalog Generator tool I got every change I did in Illustrator to immediately update the Xcode Asset Catalog with the new version.
The same holds true for the game object assets that I got out of Blender, but I usually made some hand painted tweaks in Photoshop there before passing the asset on to the generator.
As Xcode 12 now supports SVG files in the asset catalog, I'm able to simplify this even further by just sending SVG files directly into the asset catalog as long as I have UI elements that are suitable as vector graphics. Which is what I am doing for the next game I'm working on.
UI Flow
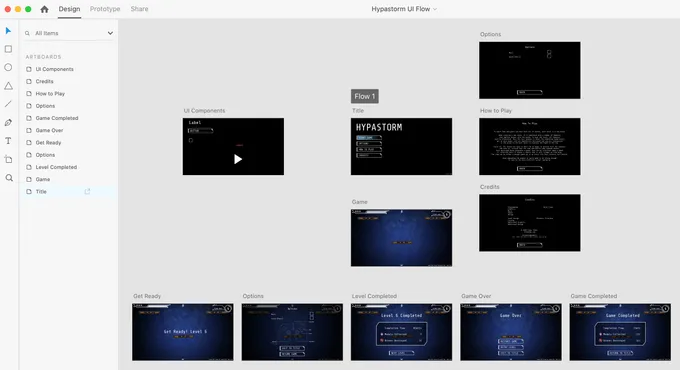
With my Creative Cloud subscription, I have access to so many apps, many that I've never used or bothered to install. But now was the time to give Adobe XD a spin.
While I was not amazed with it, it got the job done. As the number of overlays and panels in the game grew, I needed an easy way to visualize the different screens and how to put it together. As I don't use any visual editor to make my games but do all these things in code, it was very helpful to have an overview in XD that I easily could edit and try new layouts with before translating it into code logic.
I did this quite late in the development of this game, but as I got quite some mileage out of XD, this is part of my workflow from the beginning on my new game.
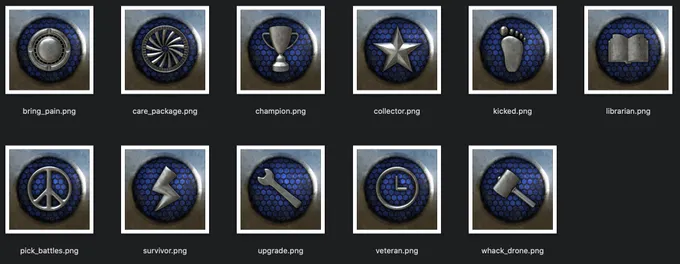
Achievements
The achievement badges for Game Center was another interesting challenge where I ended up with a workflow, based on ideas from a post in Adobe Substance's blog, where I rely heavily on Substance Designer.
A workflow that has the potential to handle tons of more illustrations in a streamlined way to not get overwhelming or take ages to make adjustments to existing badges or when adding new badges, that should fit in with the chosen style.
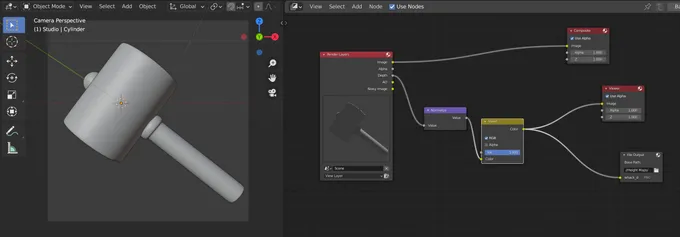
Every badge starts in Blender as a very simple object. The object is only used to be able to get a height map out of Blender. Then the height map will be the source for the rest of the process towards a final badge.
I used Blender's compositor with a File Output node to get normalized height maps out of Blender suitable for this purpose.

In Substance Designer I import all the height maps from Blender. They are linked to Blender's output files, so a change in Blender will automatically update in Substance Designer as well.
By passing in the height maps into a node network that applies materials and other styling, every badge will get the same look and design and look great together when presented in the Game Center Achievements section for the player.
The final node in the Substance network is the PBR render node. That node could easily be replaced with a more stylistic arty output in a color scale for a completely different look, which I'm considering for my next game.
Anyway, I did this at the end of the development cycle and the setup was a breeze and worked more or less as intended right away. I was very happy with the setup and I can easily add more achievements by just making a simple model and add the new additional height map to the Substance node network.
Audio
Initially I started using Adobe Audition for sound effects as I have access to it via my Adobe Creative Cloud subscription. I quickly dropped going down that road and Instead I ended up using Apple's Logic Pro X for everything. It was my first time with Logic Pro X, or actually my first time using any kind of modern DAW for audio creation.
Last time I was doing something down these lines my applications of choice were ProTracker and AudioMaster on the Amiga. Time flies. The evolution from old Amiga software to all the possibilities a modern DAW offers combined with all the incredible instruments you can get these days are amazing. Me, who hasn't followed the progress over the years, was stunned.
Music
As mentioned, Logic Pro X was the core of my audio production and I equipped it with some extra synthesizers that I purchased from Arturia.
I created all instruments with Arturia's SEM V for both the title song and the in game song. SEM V is quite an amazing reproduction of Oberheim's legendary SEM synthesizer.
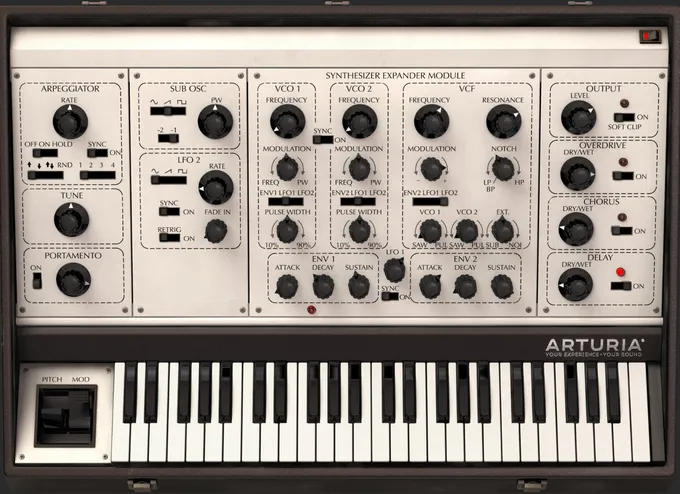
I simply just love this synthesizer, the sound characteristics and the analog GUI replication of the real original SEM. That's eye candy that I get hooked on.
I began creating the music and sound effects very late into the production and I would have liked to have used more time for it. I felt that I rushed it slightly, as I spent a major part of my audio time learning how to use Logic Pro X and SEM. Still, I think the audio turned out good enough to do the job.
For my next game I will keep making the audio in parallel with the rest of the production, so I don't have a huge amount of sounds to create towards the end. And also, now I know my way around a DAW, so I will not have to use time to learn the actual applications.
I might take the opportunity to explore a different instrument next time, I'm currently eyeing Analog Dreams from Native Instruments, to get the lovely 80's movie synthesizer sound as the foundation for my next game's soundtrack. Either that or Roland's JUPITER-80 synthesizer, which is virtualized by Arturia.
Sound Effects
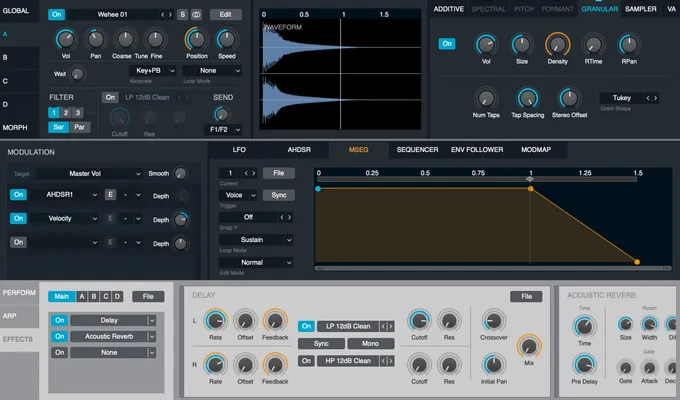
For sound effects I ended up sampling a few sounds myself and the rest I created digitally with Alchemy. Alchemy is included with Logic Pro X and is a powerful synthesizer that I haven't spent enough time with, I was too eager to play with the synthesizers I got from Arturia.
Anyway, Alchemy turned out to be a good companion to get sound effects created. I should dig a bit deeper into it next time.
The sounds I recorded myself, I captured with my old trusty Zoom H4N portable recorder, which I imported into the new sampler that comes with the Logic Pro X 10.5 update.
For my next game I will definitely spend more time with the sampler and do more of my own recordings. I like the feeling to start with my own analog sounds as the source for the effects. On top of that, I'm also tempted to try Massive from Native Instruments as an alternative to Alchemy.
The options of cool software instruments available these days are endless and they are all too fun to play around with.
Audio Formats
Once the sounds are ready to go into the game, I've made a batch processing tool that converts the audio to optimized formats for Apple's devices.
The music I keep as Stereo 48kHz, AAC. The music is actually responsible for most of the game's download size. Probably over 50% of the game size is the audio, on the top of my head.
The sound effects I convert to uncompressed Core Audio Format, little endian in 16 bit, Mono, 24kHz. I couldn't really hear any difference between 24kHz and 48kHz for the sound I've made for the game, so I opted to save some space and processing power to go with 24kHz.
Progress Tracking
There are so many productivity systems out there these days, all fighting for your attention and promising to be the magic bullet to succeed with your projects. Hypastorm is not the only game I've been working on, so I've had quite some time to give many of the usual productivity suspects a fair run during my game development endeavors so far. But as I've progressed with the games, I've simplified, and then simplified more, how I manage my tasks. Right now I'm finding it to be more efficient with a few simple lists of tasks in Things combined with spreadsheets.
I actually do like kanban boards and related workflows, which is why I've tried to apply it on my game projects. I've used Jira, Trello and other similar systems for years when I've been developing apps with larger teams. In such cases, those systems are excellent! But I found out when I'm basically just a solo developer with an "assistant" that work on different things than me, it felt overkill for things I could organize and overview easier in plain old lists.

So instead I make an area in Things for each game and then add a project for every hat I have to wear during the development the game. Naturally that is Code, Art and Audio but also things like Ideas, Marketing and QA gets their own projects.
In each project I organize tasks under headings. For instance in code I make a heading for each planned build / milestone, so I can track what to code and fix next, and then I can simply archive the heading when done.
It just works out to be very fast and reliable. I have my tasks available on all my devices in a native app, so I can sort and organize my tasks whenever I have some spare time. While I was happy enough with Things instead of a kanban board to manage my tasks, one thing I really missed is attachment support. I sort of patched that with using Bear as an attachment "add-on" for Things. That's not perfect, not even close.
Other useful applications I use are Apple Numbers where I track all the art and audio assets I need to create, in spreadsheets. I actually rely on Numbers quite a bit, everything from time tracking, balancing enemies and weapons to planning achievements and their difficulty versus rewards.
MindNode I use for diagramming. It's not really a diagramming app, but I found it to work out quite well for that purpose, and I like it way better than the different web based diagramming apps I've tried. I visualize my workflows in MindNode and I also design things like decision trees for game AI.
And finally I use a dedicated game development journal in Day One to note down my personal thoughts after each day of game work, so I get obstacles, solutions, victories and defeats on record for me to maybe evaluate later. I like to record a short video for each entry if it makes sense as I enjoy seeing the game's evolution by browsing the videos when looking back.
Conclusion
Hopefully this overview of my asset workflow has been helpful and given you some ideas for your projects that you can take with you and use.
For me, there were many lessons learned during the production of this game and I now have a much better and more effective foundation when I'm working on my next game. I'm sure I'll run into many new things to solve in that production too, and keep refining and improving my pipeline further.
Finally, the game is available in the App Store for iPhone, iPad, Apple TV and Mac, if you'd like to give it a spin.